Airmail is an email application on both MacOS and iOS. It’s a popular alternative to the stock Mail offering on both platforms, mainly owing to it’s highly customizable nature and gorgeous aesthetics. (It’s no secret that the native applications are somewhat dull to look at!)
Here, I’d just like to cover my five top tips for using Airmail and using it to help Keep Your Inbox At Zero Like a true Productivity Ninja.
1)Customizable Swipes and Shortcuts
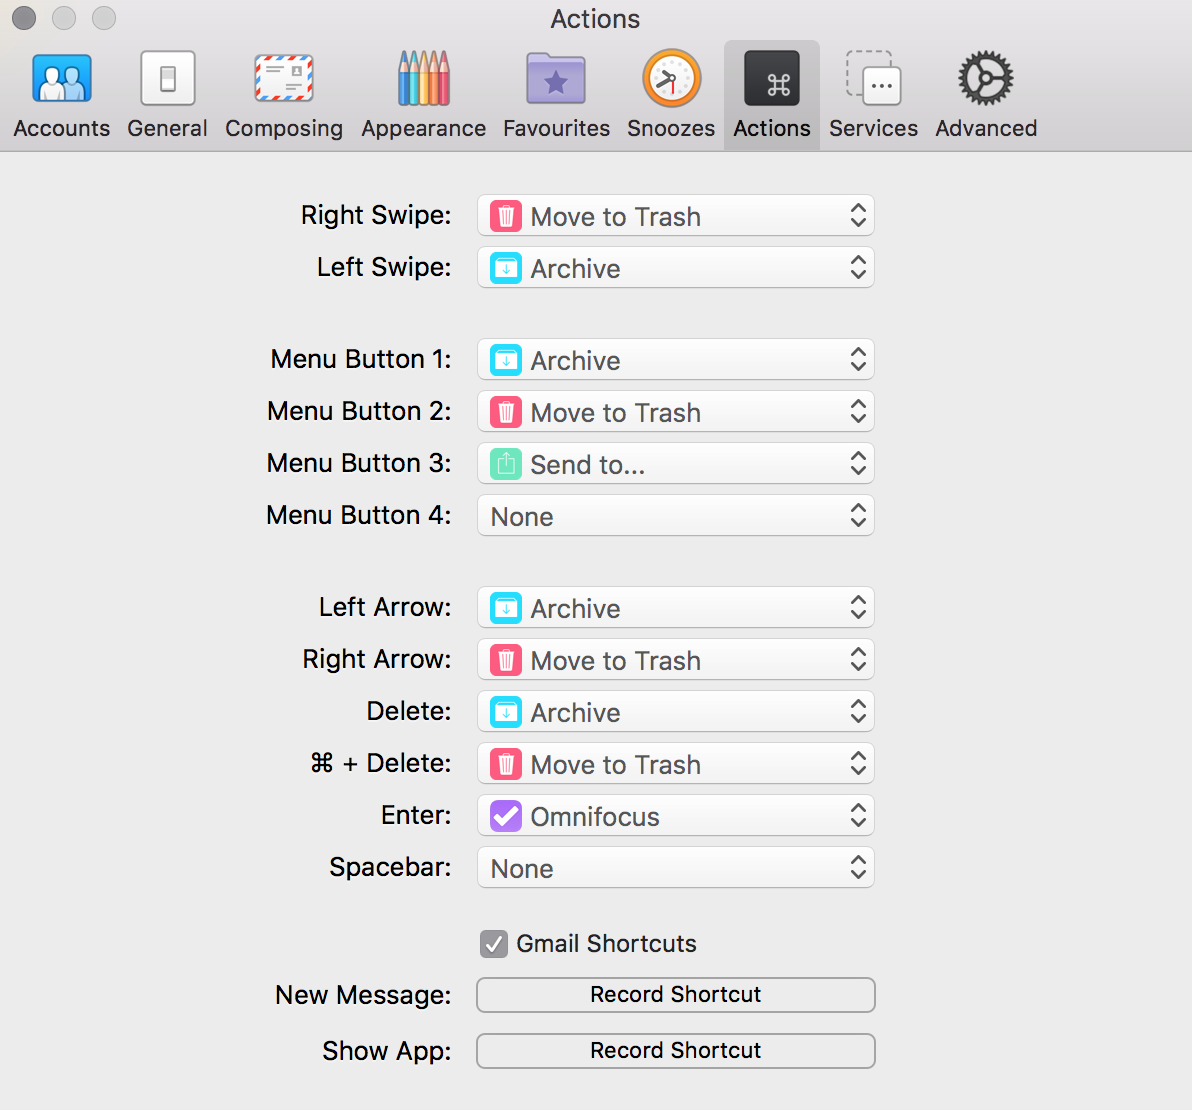
We all know what it’s like when we process our Inbox and find ourselves needing to take different actions on each item. Sometimes they need archiving, some would be better served in our Second Brain Tool whereas the majority belong nowhere else other than the Bin! Airmail allows you to configure either swipes or shortcuts for these actions.

You can see my basic setup on the screenshot above. As I process and find an email I’d like to keep for the future, however don’t need to action, I either swipe left or press the left arrow key. Quite often, I’ll find myself with ten or so emails in a row that just need archiving – it’s so quick just tapping the same key ten times!
If something needs to go to my Second Brain tool, or ToDo list because I need to action it later (in my case, OmniFocus), I press Enter. Not only does this create an action in OmniFocus, it also pastes the text of the email in the Notes field, as well as a clickable link to the original message. This means that when I’m working through my To Do List for the day and happen across this task, I don’t need to manually open up Airmail and look for the message – I simply click the link and away I go.
There are also options for saving the email to PDF, Unsubscribing (great for newsletters and spam), Send to Calendar and many others.
This is where Airmail displays a lot of power.
2)Snoozing Emails
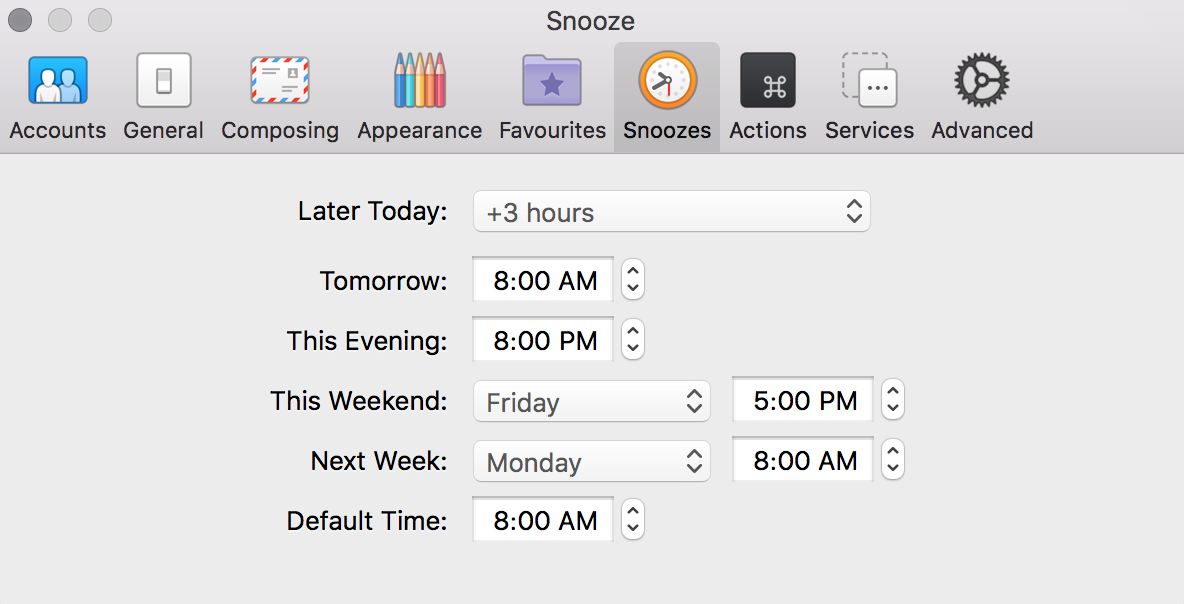
Snoozing Emails is something that, personally, I use very often. However, as productivity is a very personal thing, I know many people who LOVE it so it’s only fair I mention it as it’s a big feature within Airmail.
You can push an email into the future, if it’s not something that you need to know about currently. Say for example you receive an email about a band that’s playing next year, but the tickets don’t go on sale for a few months. You can, of course, put a date in the calendar, alerting you that it’s time to purchase those tickets. Alternatively, you can snooze the email so that it arrives back in your Inbox a week before the sale date.

3)Send Later
Do you send emails, only to receive a response almost instantaneously? That can be bad news because it means the recipient knows you are there! If they’ve responded in kind with a question then they expect a response straight away! We’ve all been there.
With Airmail, you can schedule the date/time an email leaves your Outbox. I use this feature a lot to help avoid the above scenario. If somebody emails me and it’s something I class to be urgent, I will pick up the phone and speak to them directly. If it’s not, I will respond inline (if it takes less than two minutes) however I will schedule the email to leave my inbox in the future. It’s not my default workflow, however there are times when it’s needed to help maintain my Stealth and Camouflage.

4)Adding External Services
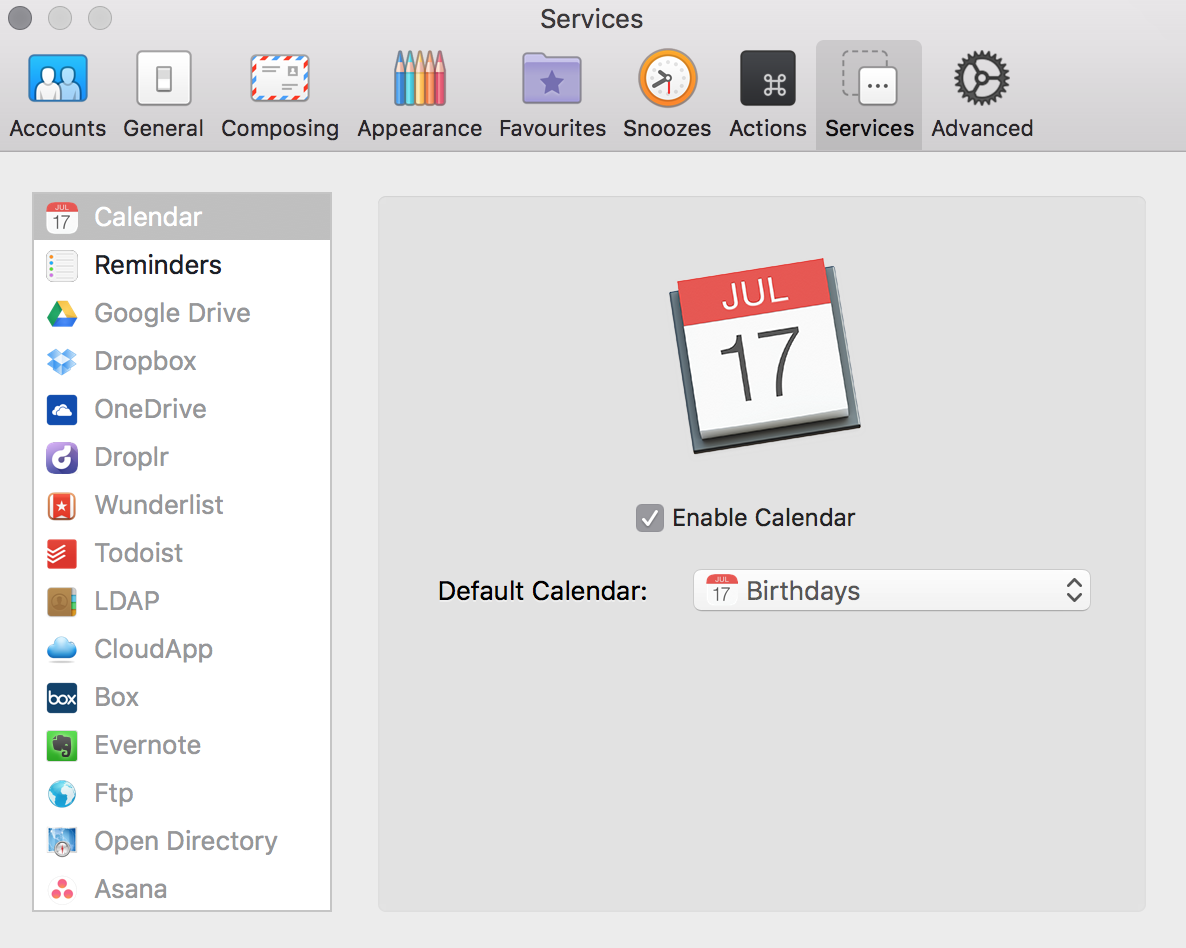
I mentioned earlier that I can send emails directly to OmniFocus in order to get them into my Second Brain tool. This is because Airmail can interact with a host of third party applications. Most the ones you can see on the screenshot below are To Do list applications, however there are some great storage and informational applications as well. Pushing an email out to Evernote because you would like to file it with other project files, such as plans, spreadsheets etc is a good idea, as well as cloud storage services such as Dropbox or Google Drive. Some of you may use collaborative applications such as Asana or Trello – these are included to.

5)iCloud Preferences and Account Sync
You may use Airmail with several different email accounts – at the very least, work and personal. If you select the iCloud Sync and iCloud Preferences check box in Preferences then when you setup Airmail on your iOS device, your preferences will remain the same on both macOS and iOS. This is a GREAT time saver as many applications require you to replicate all of your setup steps when configuring on separate devices.
Also, you can configure the setup options for the email accounts themselves to replicate via iCloud Sync between different devices. All you need to remember when setting up on your iPhone/iPad, is the password for the email account you are adding. All of the other information, such as email address, server address etc is completed for you.
While Airmail alone doesn’t get my Inbox to zero, it’s definitely a valuable weapon in my Weapon-Savvy arsenal that helps me get there far quicker than I would otherwise.
By Lee Garrett
Lee is Think Productive’s Productivity Ninja for London and the South East. You can get in touch with him directly here.
Before You Go…
Want to get more productivity tips
and hear more about our Time Management Training?

Give us a call at +44 (0) 1273 227 007
or drop us a line here to have a quick
productivity chat.
